Showing posts with label crafting. Show all posts

Monday, April 21, 2014

DIY Chalk Paint Part:2

That other post went a totally different direction than I had planned....sorry 'bout that!

So here's really where you want to be to learn how to paint with "chalk paint" and DIY some of that old ugly furniture you've been hanging onto!


There's a million blog posts out there with DIY Chalk Paint instructions. Basically....

You get a bag of DAP Plaster of Paris. I went with a 25 lb bag.... Go big or go home!

Then you'll need a few brushes. I went with the cheaper ones because I wasn't quite sure how they'd wash up. Project Source 3" Synthetic Brush. I personally like the 3" (we also got a 2" as well but I like the wider one for this).

Then the only other things you need are your paint and some tap water.
Simple enough.

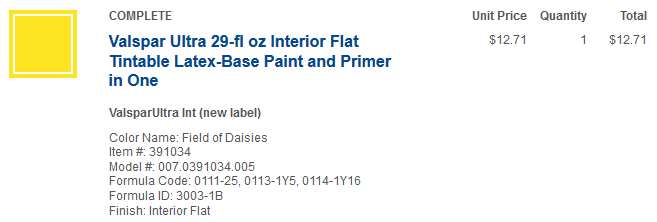
Again, here's the paint we chose. Valspar Low Odor, Zero VOC in Field of Daisies.


Now that you know the supplies you need...onto the HOW part!! The fun stuff!

DIY Chalk Paint Mixture:
1/3 cup Water
1/3 cup Plaster of Paris (PoP)
1 cup Paint (flat)

Items you'll Need:
Plaster of Paris (PoP)
Water
Flat Paint
Paste Finishing Wax
Stir Stick
Bucket to mix ingredients
Paint Brush
Drill or Screwdriver

To start, remove all hardware from your piece of furniture and lay it out for spray painting.


I used Rustoleum Oil Rubbed Bronze. This stuff is my fave!! It covers so well and gives a nice flat-ish finish with a shimmer. It sprays so easily and evenly.

You think those clod-hopper handles would never look amazing no matter what color you paint them? Well trust me, paint them before replacing. You'll be pleasantly surprised how a little spray paint can go a LONG way in totally transforming some ugly old brass handles!


Do this step first. That way, you can get in a second coat of spray paint and hit spots you somehow missed the first go-round. And.....so that you can get everything put back together once the last coat of paint dries on the furniture. You'll want to get your piece back together ASAP to see your hard work!!

Now for the paint, and why we're all here....

Basically, you mix equal parts water and Plaster of Paris. I am always mixing up way more than I need because who wants to only get a cup of whatever-it-may-be mixed up only to find out you needed like five?! So I mixed 2/3 cups water, 2/3 cups PoP and then 2 cups of paint.


HOWEVER....I didn't actually put 2 cups of paint. I only added one somehow and my mixture was watery and didn't cover extremely well the first two coats. Whoops!

HOWEVER-EVER....It still worked! It covered, albeit streaky.


As you can see, the paint went on pretty watery. I gave all of the drawer fronts and the base itself a good coat, then I went back and added a little paint to my mixture once I realized I had only added 1/2 of the called-for amount.

This really is one of those projects that the kids can actually help! Yay for not having to say no! My youngest was sleeping, shew! But L-man got to help out. I was a little paranoid that his major streaks and drips would show, but in the end, it worked out great and it covers nicely. I like the imperfections myself. And I REALLY just like the help!!

Here is after two coats. So you can see, still some streaks, still some dark showing through. But it helped me to see a "distressed" look and I was diggin' that!

This is when I began to really love the 80's touch on this dresser. The fan was actually adding some character. I love character!

I actually gave the base of the dresser only two coats because it had more paint added to it. 


So once I added a third coat to the cabinet door and drawer fronts and let them dry, I went back with a 220 grit piece of sandpaper and just scrubbed in spots - some places a little more than others to give it a nice distressed look. (You can see that the above photos had already been distressed) The distressed look really fits our house. Distressed = Good. Because then when it gets banged and scratched, it looks like it is meant to be there!


Swoon! I love it already!! And here's why I say to spray paint the handles first!! I was ready to assemble and see the masterpiece!

But first, all of the posts I researched said to add a layer of Paste Finishing Wax for a protective finish. It also gives it just a bit of shine and brings the color out just a tad. It gets a little "chalky" - hence the name....duh! But the paste wax with give it just a bit of sheen that is nice.

I took an old washcloth and just rubbed it into the wood and voila. Easy stuff. I suppose I did it correctly?! This stuff smells pretty strong so I recommend doing it outside or wearing a mask.


I let it dry for, oh, about fifteen minutes. It says to let it dry longer but that was good enough for me and my impatient self!

We reassembled the dresser handles, hinges and drawers and moved it on into the living room for it's new home.

 I'm in LOVE!!! Luuuurve!!!! The yellow just makes me happy!

Ain't she purdy?! I'm so proud. And she holds all of our DVD's and Wii games & equipment perfectly!

This was a fairly quick and easy, Sunday afternoon project that turned out way easier than I expected. It isn't perfect. But it works. And it is DONE! Whoop!! Now....to just finish that pallet wall!!!!!

 So again....


We opted out of the top mirror piece for obvious reasons but I do think it would've looked pretty cool in a bedroom setting.

Not using the top piece will allow us to hang the flat screen TV above on the wall...just is case it isn't obvious to you why we didn't use it. Ha!

Can't wait to see this whole room come together!
Stay tuned!

DIY Homemade Chalk Paint Part:1

There's a little well known fact about me....I'm cheap.
And I'm a hoarder. 

So after the past few weeks of moving...and moving....and moving more junk.... I had it in my head that I was for sure going to sell or donate to Goodwill, most of the big bulky furniture from our old house. It was outdated. It was u-g-l-y. It was way too heavy and frankly, I didn't want to mess with it.

So I posted the furniture, bless it's heart, on Facebook for sale for what I thought was a great bargain. $200 for an entire dining room set. Someone would snatch that right up...money in my pocket...win-win!!

Too bad my friend guilt-tripped me into keeping the blasted furniture. I huffed and puffed because for ONCE I had actually parted with something!! I was on my way to dehoarding. Or so I thought!

After telling my hubby that we were keeping the furniture after-all...we loaded up the junk and brought it over to the new house. I may have sighed. Really. It was ugly. And big. And it had the worst little seashell-meet-80's-fan look on the front of it.

But. I held out hope. There's this huge Pinterest fad going around about Chalk Paint. Ever heard of it? It's everywhere. Everyone is doing it. It supposedly will make any piece of furniture look amazing, no matter the existing finish.

http://www.pinterest.com/amandaeller/

However, there's no way I'm paying $30 for a quart of paint. Ever. Remember I'm cheap. Not to be confused with cheap date, although that's true too because I'd totally settle for a CookOut milkshake and TacoBell beef meximelt. Yummmm!


Food always distracts me!! Especially when I have a belly the size of Uncle Bob, the family boozer!

Back to chalk paint.....as I've mentioned before, I am a color-phobe. I'm scared to death of choosing, wait, COMMITTING, to color and with a $30 price tag, I'm even more scared!!

I love the teal, yellow, coral, even the hot pink. Especially the green though. It's probably my favorite, oddly enough!

Well Wednesday was D-day for getting all of the rest of the junk from the house so that the new renters can move in. First we had to make a trip to Lowe's to haggle on a stove (that we got at an AWESOME price!! whoop whoop!!). So while they were negotiating and talking appliances, I mosied on over to the paint center. There's one good thing about shopping with your husband, father-in-law and hubby's uncle......I had to hurry. There was no hem-hawing allowed in the paint department. I had to choose and be done.

And I did.
I did it!
I chose a paint color.

And not only one paint color but three!!! (with a little help)

And I also scored BIG TIME!!! I totally should've checked the reject pile first but as it was, I got almost a whole gallon of hot pink that was the exact shade of the quart I had the sweet lady mix for me. If it was not exact, it was pretty doggone close! Plus there were several $1 jars begging for me to add them to my collection of crafting supplies.


I swear I'm getting to the good stuff......

I chose a lovely shade of yellow to overhaul this hideous dresser of mine. Actually, I admit, hubby chose it. What's up with that?! And he actually wasn't rushing me either....he was helpful! He loves color after all! 

We went with "Field of Daisies" in Valspar Low-Odor, Zero VOC. This stuff literally has no smell at all. It's great! And I always say "Gimme the cheapest stuff you've got". I know the people always do an internal eyeroll but whatever. I'm cheap!! I know though that this isn't the cheapest paint, but it is Valspar brand and she probably saw the monstrous belly and saved my kid from growing another arm.

Here's the rundown. Gotta love www.mylowes.com, you can track all of your purchases. Believe me, this comes in handy when you run out of paint, throw the bucket away and realize you need to touch-up and have NO clue what color it was that you bought. Trust me.


Bright yellow. A good bit brighter than the colors I had picked out. But, I wanted hubby involved and because he really has had no say-so in most of the interior choices and there's LOTS of white....so I "let" him choose. And honestly, he did a great job. I love the color.

Here's a little sneak peek:


Part 2 to come with instructions!!!! This post is long enough!
Related Posts Plugin for WordPress, Blogger...